The sky is a bit darker and the south wind is blowing. My bones are bit more achy and the butterflies have returned to my stomach. Here on the Wasatch front, winter finally feels as though it is on its way. If things go according to plan, we will be snowboarding in just a few days. In the meantime, however, some simple things can be done in order to help get your gear in top shape so you won't be fumbling around once the snow is on the ground. I went into the Milosport (3300 South and 3119 East in Salt Lake) tune room and picked a few easy things that you can do (even at home) to start your season off on the right foot and a fast board.
And for good measure, I have selected a few of this year's snowboard movies that will be sure to get you hyped while you are fine tuning your kit.
Tech tips for an easy opening day:
1) Wax on, wax off... Repeat
Waxing your board is an obvious first step for gear prep, but there is one simple thing you can do to make that wax job better and last longer. With your iron, evenly spread your wax. I like to use Bluebird brand all-temp for pretty much everything. Instead of immediately scraping the excess wax, put your board on a rack or any safe spot in a warm room for 12-24 hours. This way, the wax will fully penetrate the base material on your board and set into the pores of the plastic. After the overnight hang, scrape your board and then repeat the process one more time. Not only does waxing make your board fast, it keeps the base healthy and less fragile. The more wax you can keep in the pores of your snowboard base, the harder and quicker it will be and you will have to wax less often throughout the course of the season. This method is tried and trusted by Mt. Baker Banked Slalom and US Open halfpipe champs going back decades.

2) Hardware overhaul
An entire season (or multiple seasons for that matter) can put a serious hurt on your mounting hardware. I highly recommend going to your local shop and picking up an entirely new set for few bucks and replacing your bolts and washers for a no-slip experience. A warning, however, make sure that you are getting the correct length of hardware, for certain board brands such as Burton use a different length hardware than others. If you use a bolt that is too long, it can damage your board. While you're at it, tighten the rest of the screws on your bindings to make sure nothing shakes loose.

3) Filing system
More than likely, you will have burrs on your edges from last season that will make your board feel sluggish when you are on edge. If you want to pay a shop to take care of this with a basic tune, you can. However, it is quite easy to fix at home if you have the tools or want to invest only a small amount of cash for the tools and you will have them for seasons to come. If you have a medium grit file, that will work great, but for sure-fire use, I recommend the Bakoda or Dakine edge tool.

It is a self-guiding file tool with two types of files that will clean up your edges. Simply run the tool over your edge with light to medium pressure a few times with the more gritty side of the file. Once it feels smoothed out, do the same with the fine grit side of the file. Also purcase a gummy stone, I use this as the final cleanup to make sure the little imperfections in the edge are smoothed out. The gummy stone can also be used in its own for quick edge smoothing operations when you are in a pinch. Each of these items can be found at your local snowboard shop for $10 or less. You will be amazed at how much of a difference smooth edges will make in your ride.

5) Best feet forward
BOOTS ARE THE MOST IMPORTANT! I cannot stress this enough. As flashy as boards can make you look and feel about yourself, you are nothing on hill without happy feet. That being said, I will recommend the two things that have saved my feet from the agony that I went through for a couple of seasons. First and foremost, get a pair of boots that fit correctly from a shop that knows what they are talking about. Don't buy something just because it's super cheap. Spend the extra $50 for the boots that hold your heel in place and don't feel like house slippers. Once you have your boots, or if you want to improve the boots you already have, get them heat molded.
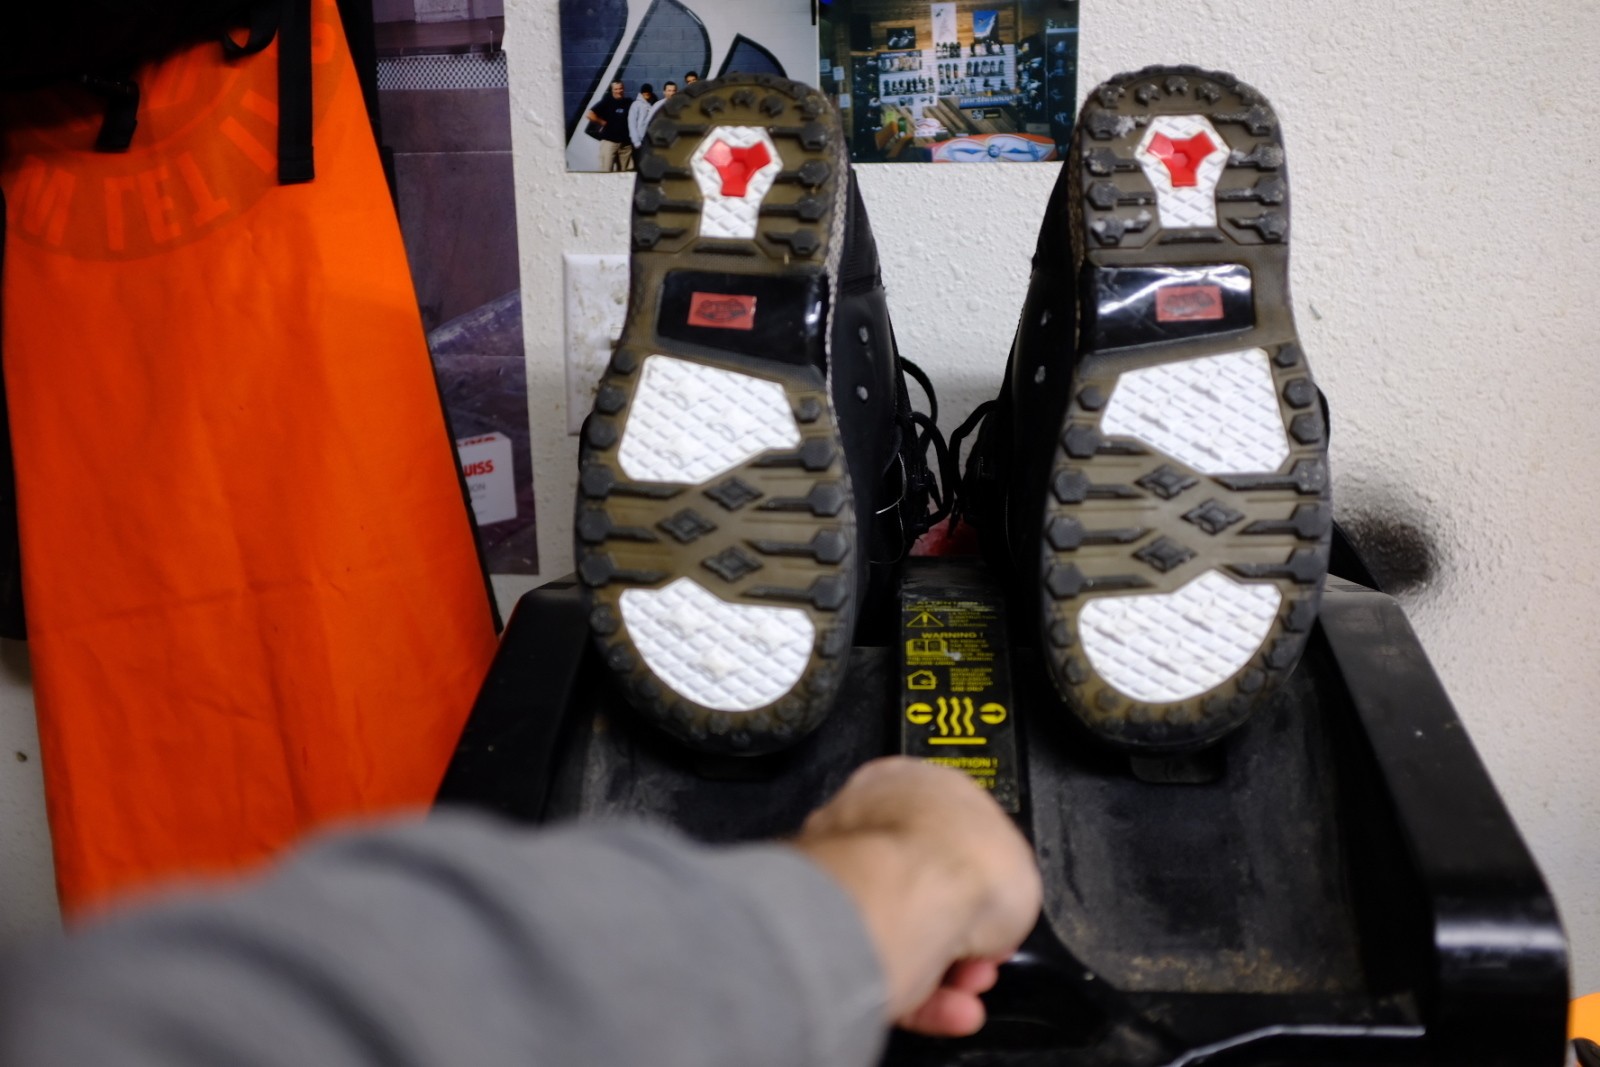
Shops will do this for a very small fee and it makes a world of difference. They will be put on a heat machine for a bout 15 minutes and then you will stand in them while the foam forms around feet. It is a game changer. The last thing I will recommend, especially for the rider that is on hill 20 or more days a year is getting custom insoles. Here in Salt Lake City I have been going to Inkline Foot Science on 3300 South and 2917 East, and they saved my snowboarding career by getting my feet into the right position in my boots. If snowboarding is your passion, invest in your feet and get a pair of custom insoles from a certified boot fitter like Inkline.

6) Twist and Shout
High back counter rotation is something that not very many people talk about, but a lot of experienced snowboarders do it. Essentially it is a way to maximize the surface area of your binding highback to align it behind your leg for more effective heelside turns. It is super easy to do, and you will feel a huge difference on those heelside carves. You need to undo the hardware that holds your highback in place. Once the highback can move freely, twist the highback so it is parallel with the heel edge of your snowboard and then place the hardware back. Depending on the binding make and model, the hardware will be in a different place, but you will be able to do this with any binding that uses the normal highback and two strap system (the exceptions being step-in and Flow bindings). It is an old trick that some of the riders with the best board control have been doing for years.

Movies that will set the mood —
Absinthe Films has been documenting the best snowboarding for nearly two decades and they always get me excited to ride. If you like their films, check out their indiegogo page to see what kind of benefits you can get for supporting their art and keeping the radness coming.
2) Snowboarder Magazine/Bode Merrill's "PEPPER"
SLC local Bode Merrill assembled and amzing crew for his latest project. The stuff these gusy are doing is next level.
3) Transworld Snowboarding's "Arcadia"
Some of the best talent from across the globe got together for this year's TWS offering.
4) Quiksilver's "Depth Perception"
Travis Rice and company are at it again with this unique flick that takes place in the British Columbia Backcountry.
5) "Beacon" by Louif Paradis, Hayden Rensch and Snowboarder Magazine
The greatest rail rider of our time, Louif Paradis has teamed up with filmmaker Hayedn Rensch to bring a thoughtful look into the mind of a modern-day snowboarding genius.
*** (Special Category) One to keep an eye out for ***
The Vans Video "Landline" due to release in January.