
Backcountry Snowboarding 101

By Mackenzie Ryan, a Salt Lake City based professional snowboarder and writer.
Backcountry Snowboarding 101: Six Things You Need to Do Before You Go Out the Gate
Visions of deep, untouched powder turns fill your snowboarding fantasies. Here and there, you’re able to get off work, get to the resort early, and experience this fantasy in real time. However, like every maturing rider, you want more choker pow more regularly. The backcountry’s blank canvas calls.
Before you chase exploration, adventure, and powder into the backcountry, follow our checklist of the six things you need to do to learn about safe backcountry travel.
1.) Get Formal Avalanche Education
“Knowing about avalanche hazards opens up the keys to the kingdom,” says Paul Diegel, Executive Director of the Utah Avalanche Center. “Not understanding avalanches is kind of like playing Russian roulette.”
The Utah Avalanche Center makes it really easy to get avalanche education, offering on-snow clinics, Know Before You Go Awareness talks, avy ed 101, and companion rescue classes throughout the winter.
The best path for aspiring backcountry travelers is to start with the free, one-hour Know Before You Go lectures, then take avalanche education 101, which includes one evening in the classroom, and one day on snow.
Once you’ve familiarized yourself with the basics of avalanche awareness, then it’s time to take the AIARE Level 1 class. The three-day course will help you recognize avalanche terrain and its hazard, ultimately preparing you to make informed decisions in the backcountry. Critical but often overlooked, you should next take a Companion Rescue course to learn how to save your partner.
2.) Get Appropriate Gear
Utah Mountain Adventures guide John Mletschnig is the author of Utah Backcountry Skiing. Last year, he became the first person to traverse the Wasatch in winter. He favors highly useful gear choices over ultra-lightweight picks.
“The gear that I choose to use in the field must function well first and foremost,” he notes. “It is great having gear that is small and light but that must not come at a sacrifice to functionality.”
He adds, “A large metal shovel blade, a long probe, a digital beacon with multiple antennas and a pack that can easily carry and deploy these items are all essential to carry. Black Diamond and Voile, both based here in Utah, make and carry great gear.”
Another Utah-based company, Backcountry.com offers a plethora of discounted avalanche safety gear for budget-conscious snowboarders.
As a new backcountry snowboarder, you might not be ready to commit to a splitboard or approach ski set-up. The truth is, for sidecountry travel, you might not need either. You’re taking a lift, walking out a gate, hiking to your line, dropping in, hiking back, and then (potentially) riding the rest of the day at the resort.
For about $90, you can get a lightweight pair of climbing snowshoes called Verts. Shaped like a bearclaw, they enable you to hike in deep snow and minimize postholing, making them very worthwhile backcountry tool for any pow-loving snowboarder.
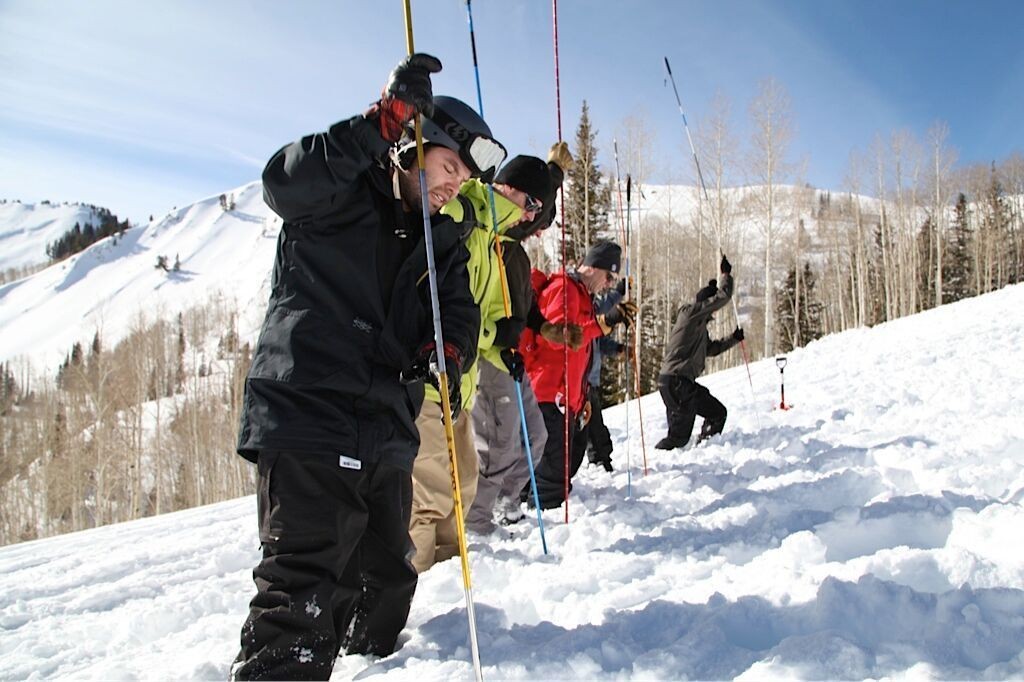
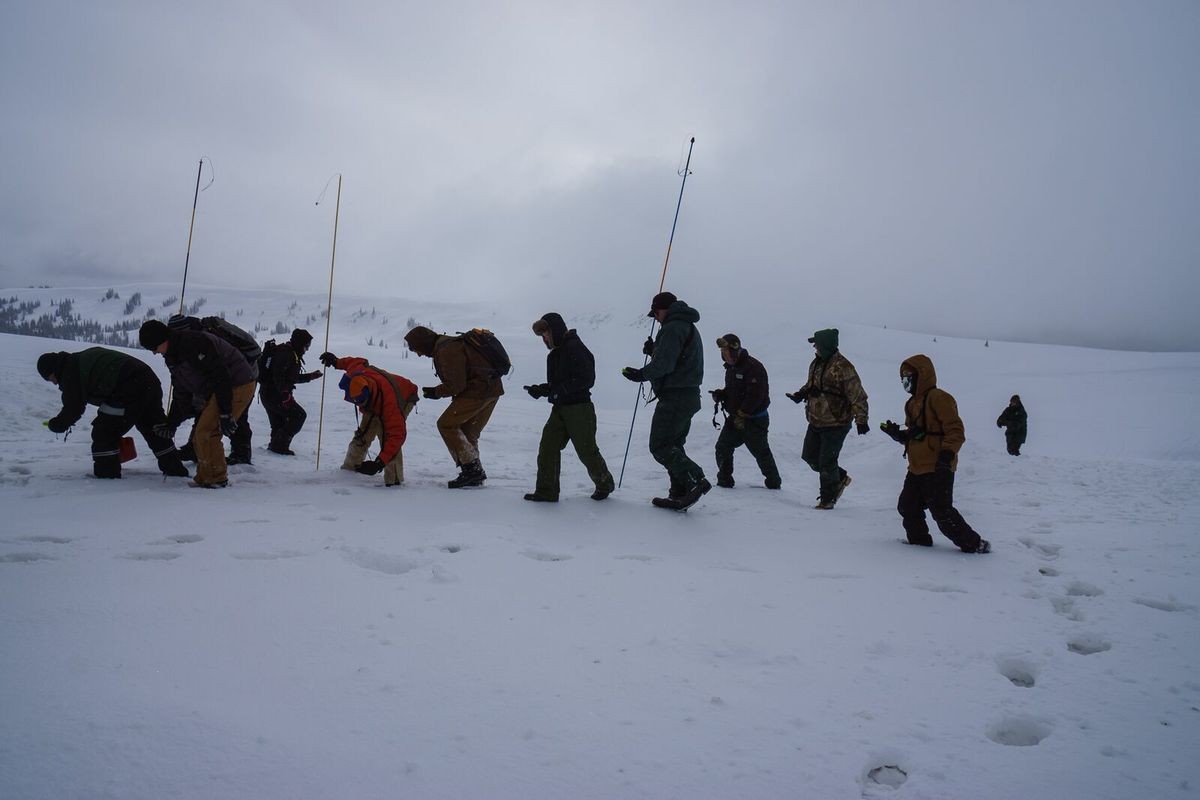
3.) Practice Rescue Scenarios
How you often and how effectively you practice rescue scenarios determines how you act under pressure.
“Companion Rescue is like basic first aid or CPR. If you don’t practice it every day, get rusty,” says Diegel, who recommends backcountry travelers retake the course every couple of years.
“People also need to realize that rescues happen in really awkward places,” Diegel says. The parking lot, for example, is a terrible place to practice rescue scenarios. It doesn’t simulate the steepness, cold, physical stress, and fear you experience after an avalanche buries a member of your party.”
The best place to start practicing how to locate a beacon signal at a beacon park. Take time to create and practice rescue scenarios with your backcountry partners until your group communication and response time dialed.
Wasatch Backcountry Rescue installed a beacon park at Snowbird, on the north side of the road below Wasatch Powderbirds helipad, and at Canyons, across the iron bridge en route to Tombstone. Solitude also offers a beacon park on the west side of the resort’s Moonbeam Lot. At Snowbasin, you can practice beacon searches at the park off the Little Wildcat Lift.
“A good number to gauge personal proficiency with a beacon in a single burial search is that it should only take 90 seconds or less to pinpoint where someone is with a probe from when a signal is first found,” Mletschnig says. “Most time in a rescue is usually spent finding a signal and digging out a pinpointed victim.”
With this said, Mletschnig points out that beacon parks aren’t a substitute for practicing an actual avalanche rescue. He explains that it’s far more difficult to find a buried victim while actually riding down a slope and negotiating avalanche debris while executing a search. The closer to a real situation that can be safely simulated, the more prepared any backcountry traveller will be, he adds.
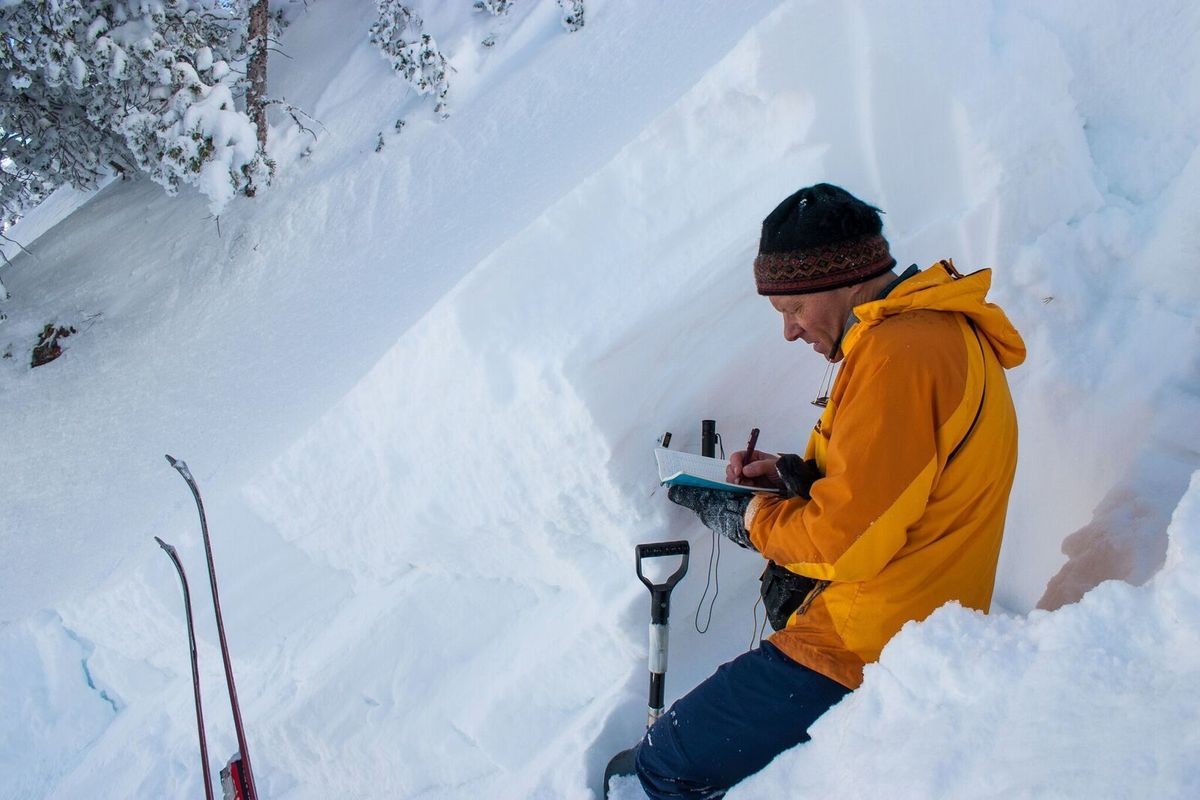
4.) Gather Information about the Snowpack
Brett Kobernik, avalanche forecaster for the Utah Avalanche Center and one of the founding fathers of splitboarding, emphasizes how important it is for backcountry snowboarders of getting the most information about the snowpack.
“Be aware of the current conditions prior to getting out into the backcountry,” he explains, “and obviously conditions change from day to day. The easiest way to get up-to-date information is to get the forecast from UAC.”
“A lot of people aren’t able to track what’s going in the snowpack and aren’t trained for those nuances either,” he adds. “The forecasters are all trained at looking at these intricate details and explaining them in plain English.”
You can check avalanche advisories in your region from looking at the Utah Avalanche Center website, or download the UAC’s free smartphone app on iTunes. Both of these sources will provide you with the most recent snowpack beta. You also can review observations from backcountry travelers and forecasters here.
5.) Choose Partners Wisely
Perhaps one of the most underrated conversations for new and aspiring backcountry snowboarders is about who will join you.
Whomever you choose to join you in the backcountry must be able to save your life--and vice versa. Before you invite partners to your next mission, consider what skills and knowledge they bring to the endeavor.
“Like climbing, kayaking, or choosing a life partner, if you’re with someone you don’t completely trust or doesn’t have good skills, you’ll have to improve the trust, skills, or find another partner,” Diegel points out.
As you start to suss out who is joining you, avoid traveling in parties of more than three people. Carefully evaluate everyone you travel with: How did they perform during practice rescue scenarios? Are they open to feedback and compromise? How is their mental and physical fitness?
6.) Start with the Sidecountry
Ski area’s sidecountry is the backcountry, and you should treat it as such.
Veteran forecaster and author of Staying Alive in Avalanche Terrain Bruce Tremper explains, “Remember that inside ski area boundaries, the ski patrol knock down avalanches every morning before the public arrives, which make ski areas extremely safe. But once you exit the ski area into the "sidecountry" or go into the backcountry from a trailhead, you are entering the Stone Age.”
“Almost all avalanche incidents and fatalities occur in the backcountry or sidecountry because there's no one doing any avalanche control or avalanche rescue,” he adds. “You have to be your own avalanche expert, plus have the minimum avalanche rescue equipment such as a transceiver, shovel and a probe.”
The sidecountry, he points out, requires that you have a partner who also has all the minimum avalanche education and equipment.
“Otherwise, there's no one to dig you out of an avalanche if something goes wrong,” he says. “Plus, you will need to carry all the food, water, extra clothing and first aid gear.”

Partners In Promoting Utah Powder


comments
Leave Your Comment