Well-fitting boots can make or break your ski experience. Sounds dramatic, I know, but it’s true! While ski boots are not meant to feel like your favorite pair of sneakers, having numb toes, pinched calves, sore arches, or a hot spot flaring from irritation can make an otherwise fantastic ski day feel miserable.
I consider myself an advanced skier and I have gone through many pairs of ski boots. Yet, I’m still learning (the hard way) about the intricacies of the boot-fitting process, that all boots are not created equal and the painful, ugly consequences of ill-fitting ski boots. So, I’m here to share what I learned recently from boot fitter Ryan Fray at Cole Sport in Park City, so you don’t have to dread another ski day in painful boots.
"The right boot can make or break your entire ski experience."
Not all boots are created equal…for YOUR feet.
You’ve got your new ski outfit and you are looking for the perfect boots to complete the look. (Insert “NOOOOO!” emoji.) Prioritizing boot dimensions of the upper cuff (calf area), instep (top of the foot), forefoot (front of the foot/toe area), and heel cup (your heel) are much more important than look and color. A good boot fitter will consider all of this before bringing a selection of boots to try on.
Customize
Like after-market kits for your dream car (looking at you, car enthusiasts), experts recommend custom insoles. Ski boots come with a stock insole, a generic piece of foam that doesn’t capture the integrity of your foot. With custom insoles, the fitter makes molds of your feet (forefoot, arch, heel cup) which capture their true structure to provide the best stance, balance and alignment.
Our feet have four common hot spots or problem areas when boots don’t fit properly. Unfortunately, I’ve been a victim of TWO of them (remember when I said painful and ugly consequences?).
· 1st Metatarsal (large bone right behind the big toe)
· Medial Malleolus (inside ankle bone above the heel)
· Navicular (inside bone directly above the arch)
· 5th Metatarsal (bone on the outside of the foot that connects to the pinky toe)
The good news is that ski boots can be further altered once they are out of the box. When you hear boot fitters talking about “punching out” or “adjusting the shell” of the boot, it means they can manipulate the hard shell and soft liner to accommodate those hot spots in your foot.
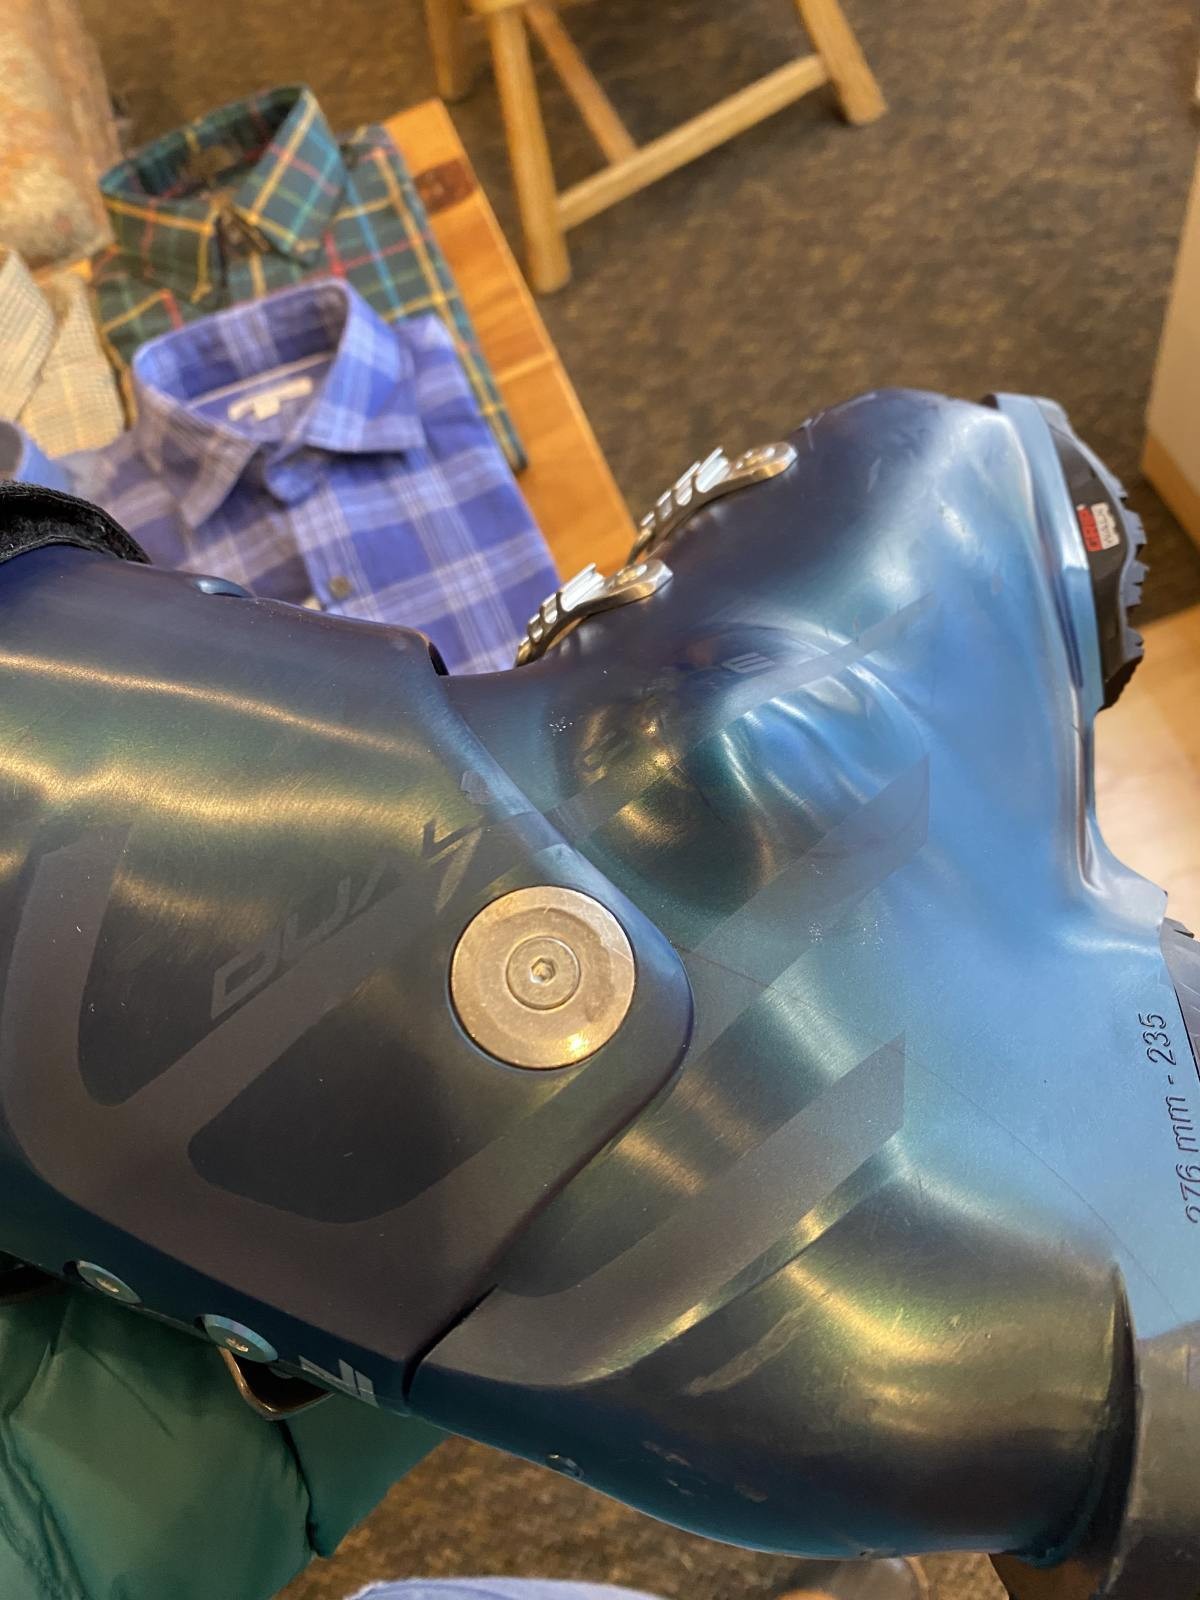
(This is my personal ski boot with the Navicular section significantly punched out.)
For more significant adjustments, it’s common to do a punch, where the shell is heated, and a press is used with lots of pressure to reshape a specific area of the boot. Grinding the inside of the shell can be a technique used for more minor adjustments to heavier boots with thicker shells.
Pro tip: typically, refinements to new ski boots are included as part of the purchase. So don’t hesitate to ask for those minor adjustments until they feel just right!
How to find a good boot fitter.
There’s no marketing magic or special secret when it comes to finding a reputable boot fitter. Traditional methods like word of mouth and referrals from happy clients, friends, or family are usually safe bets.
A good rapport with your boot fitter also makes a big difference. Be open and honest about your needs and trust that they will do the best job possible to make sure you are happy and comfortable with your investment.
“Ski boots do not have to hurt, so if you are feeling things that do, open lines of communication with your boot fitter are very important through the process.”
How much does this cost?
Mid-range to more advanced ski boots start around $500.
Custom insoles are approximately $250 - $300.
Depending on your budget, ski level, usage and other factors only you can determine what you want/need. You can expect to spend between $800 to $1200 (give or take) on ski boots when all said and done.
The boot fitting process
You’ve decided to buy boots and found a reputable boot fitter. Here’s how the actual fitting works.
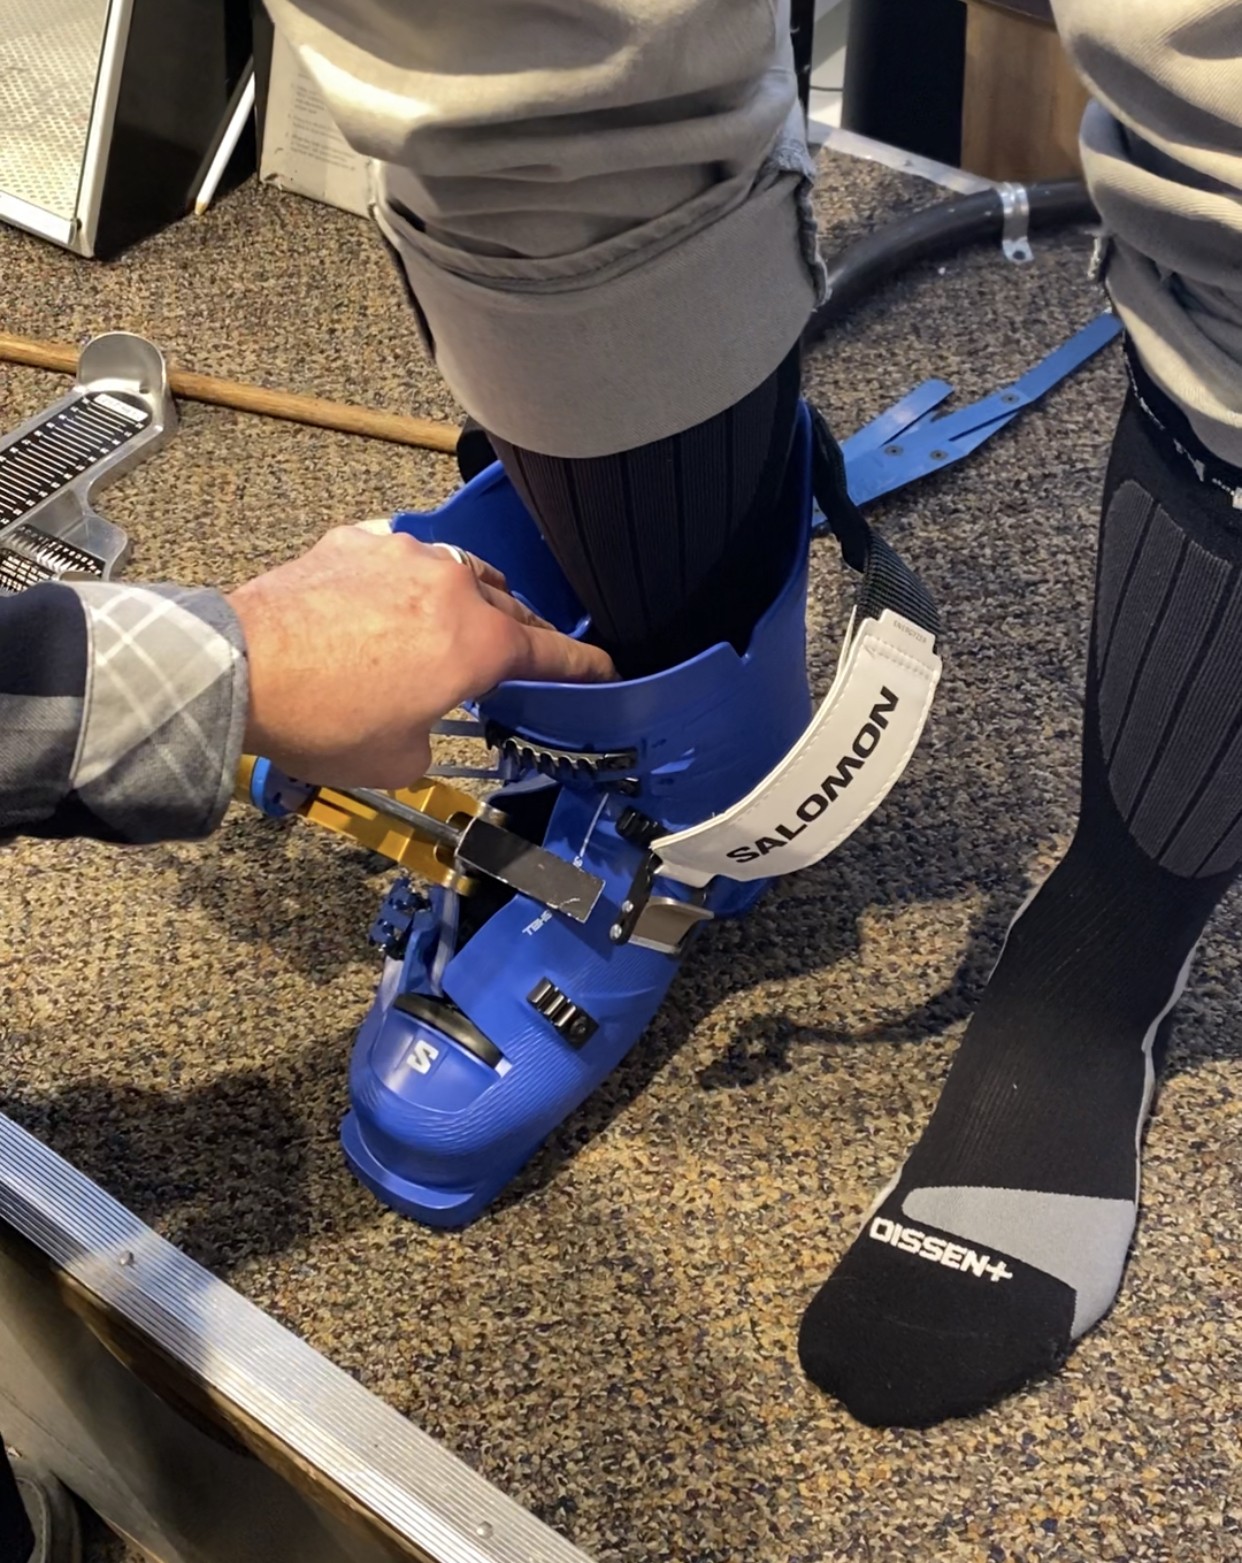
1) Foot measurement - With ski socks on, the fitter will measure your feet and check the length and width of your feet.
2) Try the boots on – You’ll first try on the boot with the liner removed, slide your foot all the way forward until your toes touch the end of the boot and a dowel (with a similar thickness as most liners) will be inserted between your heel and back of the shell. You’ll then slide your heel to the back of the boot and either a dowel or fingers will check spacing with the instep of the boot.
3) Try on boots and liner together – At this point, the liner will be placed back in the boot, and you’ll try it on again with the buckles fastened and shins pressed forward to check that the flex of the boot is engaging and you’re comfortable with the overall fit.
4) Decide on custom insoles – this is solely (see what I did there) your decision based on how much you want to invest. Custom insoles are highly recommended for maximum comfort and reduced break-in time of the boot.
5) Final adjustments – Spend time standing and walking around in the boots. If you feel any hot spots or problem areas, the fitter can grind or punch out those areas for further customization and comfort.
Don't be afraid to visit your boot fitter a time or two after the initial fitting if it's just not quite right yet. There are plenty of micro-adjustments that can be done to accommodate your pain points.
"The correct boot will make any ski day much, much better."
Pro tip: Make sure you schedule an appointment and block out several hours so that you won’t be rushed during the process.
Happy ski boot shopping!