It’s been a couple of years since the last installment of Getting the Most Out of Your GoPro blog. The last blog focused on the Hero 3 camera and was about how to make a decent edit.
So, just in time for Christmas, here is an update and. . .boy has a lot changed in GoPro land. So, let’s get started.
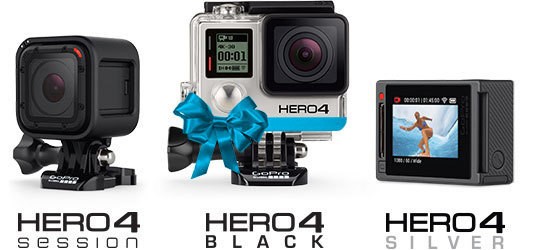
First, there are a bunch of new cameras. The best and the baddest are the Hero 4 line. There are three cameras in the line. The Hero 4 Black, Silver, and Session. The Hero 4 Black is the flagship model and most of this blog will focus on it. It is capable of shooting at a 4k resolution and frame rates of up to 240 frames per second. It also does amazing timelapses, 12MP photos at a burst rate of 30 per second, and has powerful color settings to make your photos and video look their best with ProTune.
A small step down from that is the Hero 4 Silver. This is still an amazing camera, but, by saving $100 you’ll have to make a few sacrifices, namely that you can’t shoot in 4k or 2k. You’ll have to settle for 1080p, but, for most consumers that is more than adequate. You do get one big plus though, a touch screen LCD integrated into the back of the camera that makes it easier to compose shots and control camera settings.
And then there is the Hero4 Session, a powerful, yet, minimalist version of the Hero4, if you’re a little self conscious about having a camera strapped to your person, the Session is so small and black that it’s barely noticeable. One touch controls keep it simple, but, camera settings can be controlled via the smartphone app. The camera also comes equipped with dual microphones and automatically switches to the one that will give you the best audio, this is especially handy in windy environments.
Finally, there is the Hero+ line that offers some great options from $299 to $129 depending on what extras you want on the camera, like LCD, Wifi, or just a barebones action camera. This whole line of course features GoPro’s legendary durability.
Let’s Talk About Settings
Ok, so, let’s say you decided to get a Hero4 Black, what’s the best way to use it? First of all, get the GoPro app. This allows you to connect to your GoPro via wifi. It is much more enjoyable to screw around with the camera settings via the app than it is to use the onboard menus. Also, with the app you can preview your shots and make sure what you want to be in frame is really in frame.
Lots of talk centers around video resolution. Now, 4k footage is amazing. It is super sharp and the details are ridiculous. But, it does come with some drawbacks. The first of which is storage. Shooting 4k footage is going to use about 3 to 4 times as much storage as shooting 1080. Then there is the fact, that in most instances the resolutions of and screen sizes of most phones, computer monitors, and televisions aren’t going to show the full benefits of your glorious 4k footage. But, if you want your footage to be future proof for a long time to come and you’re not concerned about how many external hard drives you have to keep on your desk, go 4k. If you are concerned about those things then 1080p is going to sufficient for most applications.
If you’re shooting POV footage with your GoPro and want to get the most action into the frame as possible, shoot in the 4:3 aspect ratio. This will take the biggest advantage of the sensor size and get the most action into the frame. If you want to shoot slow mo POV footage your best settings are going to be a 4:3 aspect ratio at a 1440 resolution and 80fps.
What is this ProTune setting you ask? ProTune is advanced color correction software built into many GoPro cameras. Turn it on. Then set Color to GoPro Color. Keep sharpening at low. Metering is something you’ll want to think about depending on your lighting situation. But, for the most part I leave mine on spot meter “off”, so, it looks at the entire scene. If you set spot metering to “on” it will set your light metering off the center of the frame. In some situation this can be good, but, choose it for a reason. For shooting in the snow on a sunny day I will set the EV Comp to -1. This will keep The Greatest Snow on Earth® from getting blown out and leave some detail in it on our many bluebird powder days.
Want to shoot with as little hassle as possible and save your battery?. Turn on Quick Capture. This allows you to to just press the power button once and the camera will automatically start shooting in your default mode. Press the button again and the camera will stop shooting and turn off. It is super easy to use this way and you’ve got a better chance of your battery making it through the day.
Shooting Tips
To get your best footage, aim the camera at the subject’s center of mass. Because the Field of View is so wide, you’ll still fit everything in without a ton of sky in shot, which is what you would get if you aim it at the subject’s head.
Want to Timelapse? GoPro makes it super easy with the Hero4 Black. Use your app to set the camera to Timelapse Video mode, then open the settings and set your photo interval. (how often to take a photo) Your choices are everything from 0.5 seconds to a 60 second interval. Think about how fast your subject is moving through the frame. If you’re shooting a moving chairlift maybe go with with that half a second setting. If you’re shooting snow piling up outside the window all night long, maybe go with the 60 second setting. Then set your desired output resolution and the camera will spit out a nice timelapse without you having to do a lot of computer work after the fact.
Accessories
Here are a few accessories that will make help you get the most out of your GoPro.
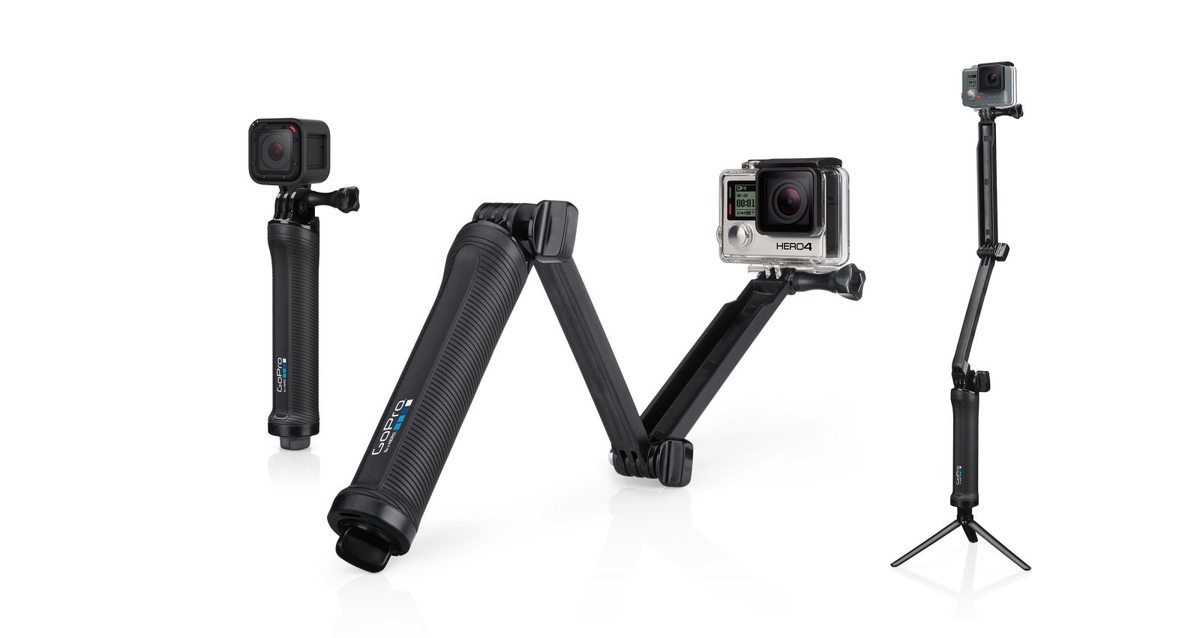
The aptly named 3-way is a handle, selfie stick, and tripod all in one handy unit. It pulls triple duty. If you’re a snowboarder it’s a great way to keep a selfied stick on you that folds down and fits in your pocket. And because of the hinge in the pole you can keep it mostly out of the shot.
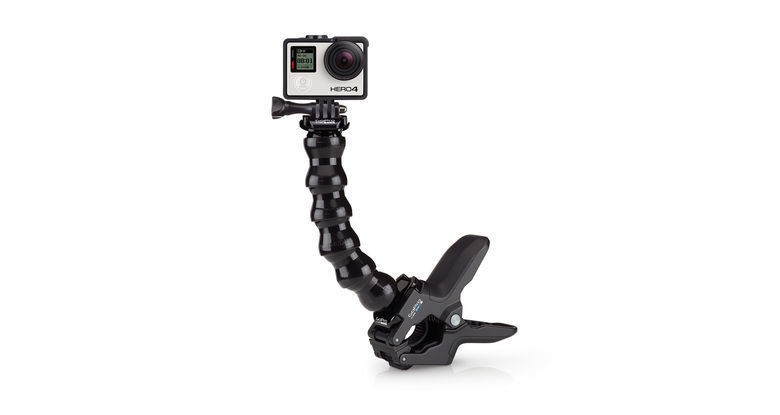
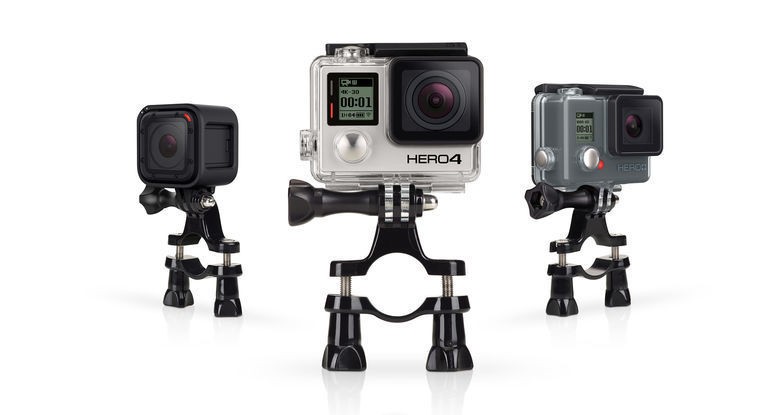
Jaws Clamp - This is a great and quick way to attach your GoPro to almost anything. Clamp it onto the roof rack of your car and timelapse the drive up the canyon.
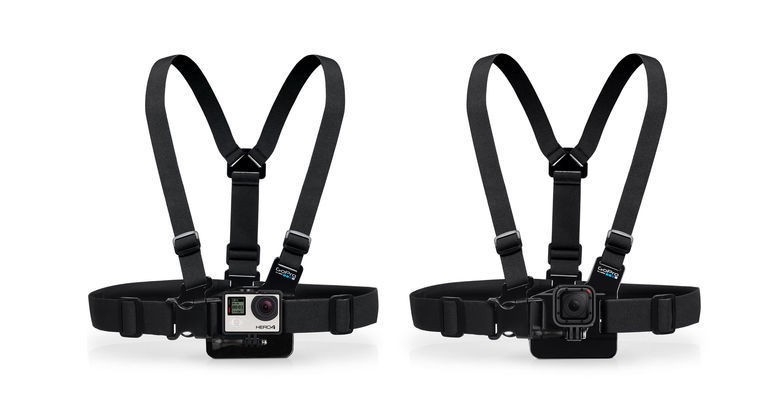
The Chesty - probably the best option for skiers to capture POV footage. Your chest does a lot less bobbing and weaving than your head does when you’re skiing.
Pole Mount - Use this to attach your GoPro to a ski pole. It’s the selfie stick you always have with you. If you really want to be really cool, you can get the new Rossignol Fat BC Poles with an integrated GoPro Mount. You’re GoPro will always be ready to rock.
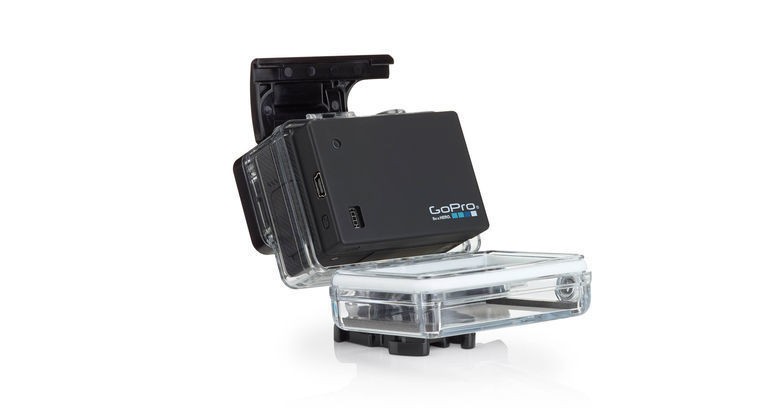
Extended Battery Backpack - Being out in the cold can really sap your batteries. By attaching the extended battery pack to the back of your GoPro you’ll basically triple your running time. It does add some weight and bulk to your camera, but, if your batteries dies on your 3rd run, you’ll basically be carrying a rock around for the rest of the day.
I hope this blog has given you some ideas that will help you get your best shots ever this season. Be sure to tag your awesome shred videos with #skiutah so we can check them out. If you have additional questions, leave them in the comments and I’ll do my best to answer them.
See you on the slopes!